Monday, December 16, 2013

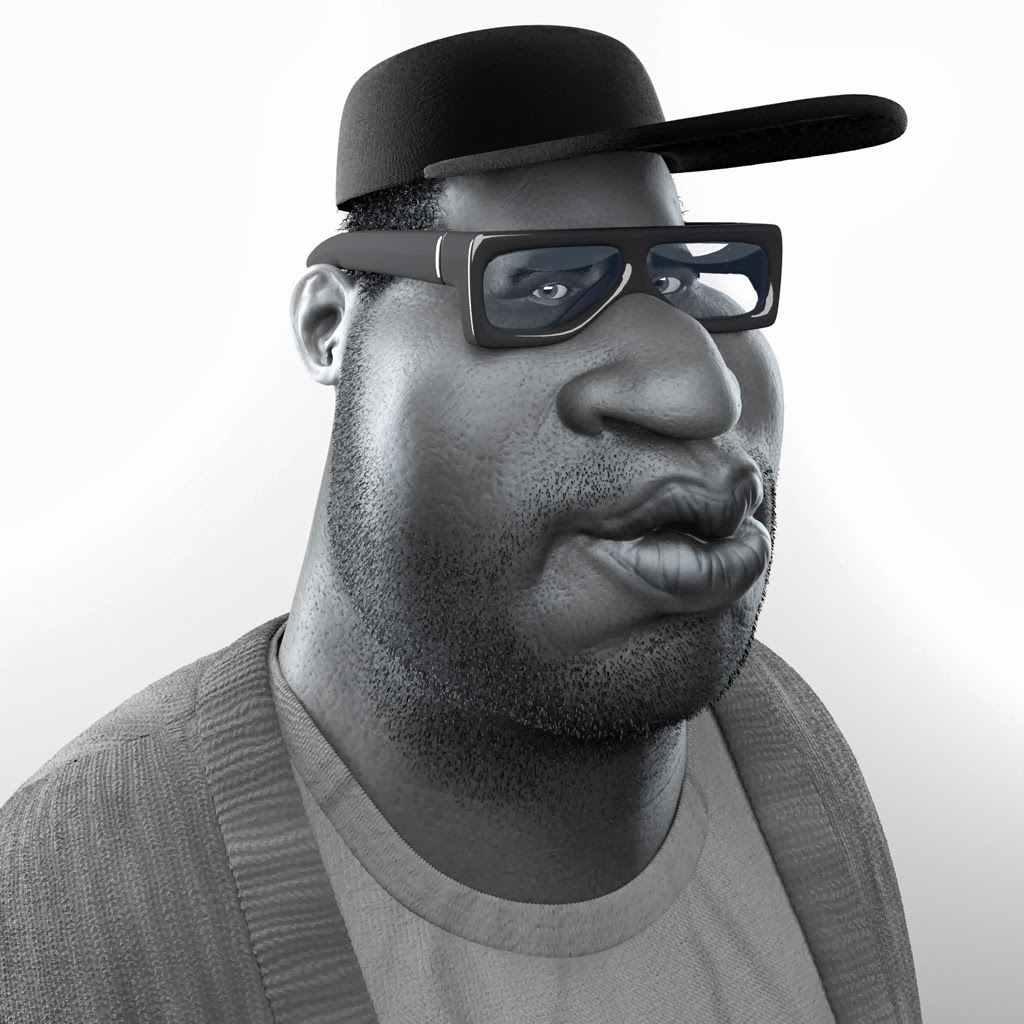
Sketch Club 13-12-06

This guys was an easy pick.  We saw the sweet hair and knew we found our mark.

ZBrush for scuplt and hair.  Mental Ray for Maya for render.

Friday, December 6, 2013

Sketch Club mark Nov. 8th


Sketch Club Mark from November 8th.  I have a backlog to do, finding the time is tricky.

ZBrush for the sculpt, paint and hair.  Maya for eyes, clothes, glasses and hat.  Allegorithmic for cloth textures.  Mental Ray for render.

Thursday, April 18, 2013

Render Buddy

Download RenderBuddy. 


Since the Maya swatch viewer can be painfully slow, inaccurate and limited in what it actually shows, I wrote my own swatch viewer, RenderBuddy.

Calling it a swatch viewer is a bit of a misnomer as it is really a render with a specific render layer.  The UI lets you connect shaders and textures to specific RenderBuddy geometry plus a few extras that I'll discuss below.

The idea is that you turn off the Maya swatch thumbnails, assign a shader or texture of choice to a piece of geometry and do an isolated render.  Since the scope is narrowed, the render times are very fast.  If you have a plugin like SprayTrace, then the feedback is realtime.


Tuesday, October 16, 2012

Procedural Eye

Download the eye and Mental Ray shaders for Maya 2013 ( Maya Binary ).
Download the Maya Ascii version. 

This is an eye that I use for personal art pieces. Everything is procedural from the size and shape of the cornea to the vein textures. Normally I set the detail lower than what you see above but the detail is there if I need it.

This was inspired by Alex Alvarez's free tutorials:  http://www.thegnomonworkshop.com/store/category/167

The backgrounds / light probes are from Paul Debevec.

Friday, October 5, 2012

Sketch Club Mark - 12-10-05


Another Sketch Club mark. The sculpt took about 30 minutes as did the render, so an hour total.

 ZBrush sculpt, Mental Ray in Maya render

Time lapse of the sculpt.

Monday, September 24, 2012

Sketch Club mark 12-09-22


Another Sketch Club mark.

I didn't have time to add his Flashdance inspired t-shirt.  Most likely he doesn't look too much like the sketch, if at all.  My view of him was limited, even though I flagged him as a possible mark. He headed across the street before we could do a casual no-we're-not-looking-at-you look at him.  So this is how I envisioned he should look.

Oh well.  It was a fun sculpt.

ZBrush sculpt and texture, Mental Ray in Maya render and Photoshop touch ups.

Wednesday, September 19, 2012

Anatomy Practice


This started out as a simple anatomy exercise. I found some stock images from Marcus J. Ranum that really appealed to me in their elegance and simplicity.  From there I thought I would just do a one hour sketch.  After a few ( lot ) more hours I decided to call it done.

There is plenty that I could do to refine the sculpt.  I have only blocked in the head, hands and feet, lots of the anatomy is soft or vaguely defined.  Even though it's not super polished, I'm happy with the result.


Above are the steps from start to finish. Far left is the ZSphere base.  I had the stock images in the background in ZBrush while I built the base.  From there I stopped using the images in the background, and opened them in a separate window.  I didn't want this to be a match-the-photo practice, rather an observation practice.  The middle three figures are stages in blocking in the form.  The far right is as much refinement as I could do before the self-imposed time limit.

The renders are done in Maya 2013 with Mental Ray.